 Variously Noted
Wildcard HTTPS on local MacOS
Wildcard HTTPS on local MacOS
Increasingly technologies that power the web platform require HTTPS to function (HTTP/2, Service Workers etc.), but there is still a surprising amount of friction involved in trying to setup a local HTTPS enabled development environment.
In this post, our goal is to configure a Mac to provide HTTPS with a trusted certificate using nginx as the web server.
We have the following goals:
https://example.sites.localdomainwill be served by:~/sites/example.sites.localdomain/index.html- The above URL will have a fully trusted certificate with a padlock in Chrome/Safari.
- In addition we want the option to be able to easily customize the Nginx configuration for each site individually, so we can configure site specific behaviours such as reverse proxies etc.
Choosing a top level domain
Per RFC 2606 you should choose a top level domain (TLD) that is reserved (such as .test), to avoid conflicts.
However your mileage may vary. Many corporate VPNs require all DNS requests to travel through the VPN preventing/impeding resolution of such a TLD. In my case .localdomain worked for me, whereas .test did not, so I chose to use .localdomain in this guide.
Install Homebrew
We will use Homebrew to install the software we need to make this all work:
/bin/bash -c "$(curl -fsSL https://raw.githubusercontent.com/Homebrew/install/master/install.sh)"
Install DNSMasq
We need dnsmasq to provide wildcard domain name resolution.
brew install dnsmasq
Configure DNSMasq
We will configure DNSMasq to use our own custom configuration folder:
sudo echo 'conf-dir=/usr/local/etc/dnsmasq.d,*.conf' >> $(brew --prefix)/etc/dnsmasq.conf
Create our custom configuration
sudo mkdir -p $(brew --prefix)/etc/dnsmasq.d
sudo echo 'address=/.localdomain/127.0.0.1' > $(brew --prefix)/etc/dnsmasq.d/localdomain.conf
Configure dnsmasq to run at startup:
sudo brew services restart dnsmasq
Configure MacOS to delegate .localdomain to dnsmasq
Next we need to configure MacOS to have dnsmasq handle
DNS lookups for the .localdomain top level domain (TLD):
sudo mkdir -p /etc/resolver
sudo bash -c 'echo "nameserver 127.0.0.1" > /etc/resolver/localdomain'
Generate HTTPS Certificate
We will use mkcert to generate a wildcard certificate that we configure our Mac to trust.
Install mkcert
brew install mkcert
brew install nss # if you use Firefox
mkcert -install
- You will be prompted to enter your
sudopassword, so mkcert can do the necessary configuration
Issue a certificate
sudo mkdir $(brew --prefix)/var/www/sites
sudo chgrp 755 $(brew --prefix)/var/www/sites
sudo chown `whoami`:staff $(brew --prefix)/var/www/sites
cd ~
ln -s $(brew --prefix)/var/www/sites sites
cd ~/sites
mkcert "*.sites.localdomain" sites.localdomain
- Issues a cert for the
sites.localdomaindomain and any sub domain ofsites.localdomain
Install Nginx
Now we want to install nginx and configure it to serve the wildcard domains under https://sites.localdomain:
brew install nginx
Configure Nginx
To configure Nginx, we will need to interactively edit the nginx configuration file.
To edit the file using nano:
sudo nano $(brew --prefix)/etc/nginx/nginx.conf
You should see a file like the following:
#user  nobody;
worker_processes  1;

#error_log  logs/error.log;
#error_log  logs/error.log  notice;
#error_log  logs/error.log  info;

#pid        logs/nginx.pid;


events {
    worker_connections  1024;
}


http {
    include       mime.types;
    default_type  application/octet-stream;

    #log_format  main  '$remote_addr - $remote_user [$time_local] "$request" '
    #                  '$status $body_bytes_sent "$http_referer" '
    #                  '"$http_user_agent" "$http_x_forwarded_for"';

    #access_log  logs/access.log  main;

    sendfile        on;
    #tcp_nopush     on;

    #keepalive_timeout  0;
    keepalive_timeout  65;

    #gzip  on;

    server {
        listen       8080;
        server_name  localhost;
        ...
    }
    ...
    include servers/*;
}
Add the following between the second last and last lines (i.e. before the closing curly brace):
include /usr/local/var/www/sites/nginx.conf
- This configures nginx to use our additional configuration file where wewill setup the serving of the wildcard domains.
Redirect HTTP to HTTPS
We want to configure nginx to redirect all http:// URLs to their https:// equivalent:
Edit the server block shown above to be:
{
server {
        listen       80 default_server;
        server_name  _;

        return 301 https://$host$request_uri;
        # Leave commented out blocks as is
        ...
}
- Change listen port to
80, mark as thedefault_server - Change
server_nameto_to catch all server names - Add
return 303 https://$host$request_uri;to force redirect to HTTPS - You can leave the remainder of the server block as is
Configure sites.localdomain
Next create the above mentioned nginx configuration file:
nano ~/sites/nginx.conf
Add the following contents to this file and save it:
server {
    listen               443 ssl default_server;

    ssl_certificate      /usr/local/var/www/sites/_wildcard.sites.localdomain+1.pem;
    ssl_certificate_key  /usr/local/var/www/sites/_wildcard.sites.localdomain+1-key.pem;

    server_name _;

    root /usr/local/var/www/sites/$host;

    location / {
        # Allow index.json or index.html for /
        index index.json index.html;
        # Redirect attempts to access .html
        if ($request_uri ~ ^/(.*)\.html$) {
            return 302 /$1$args;
        }
        # try adding .html or / to locate the resource
        try_files $uri $uri.html $uri/ =404;
    }

    # Do not any file starting with . except .well-known
    location ~ /\.(?!well-known).* {
        deny all;
        access_log off;
        return 404;
    }

    # Do not serve any file starting with _
    location ~ /_.* {
        deny all;
        access_log off;
        return 404;
    }

    # Allow custom configuration of each site
    include /usr/local/var/www/sites/$host/_nginx/*.conf;
}
This configures a bunch of handy things:
- Configures HTTPS to listen on port 443 and use HTTP/2
- points at the HTTP cert to be used across all sites
- Indicates the resources are served out of
~/sites/$hostwhere$hostis the full hostname of the server - Configure
index.jsonorindex.htmlto be served as the resource for URLs ending in/ - Configure HTML files ending in
.htmlto be served without the file extension - Do not serve files starting with
.(e.g..gitignore,.git/) or_(.e.g._nginx/) - Include optional additional configuration for a site specified in
~/sites/$host/_nginx/*.conf
Validate Nginx Configuration
It’s very easy to make a mistake while editing Nginx configuration files, use the following command to validate your configuration:
nginx -t
Restart Nginx
Each time you make a configuration change you must restart nginx as follows:
sudo brew services restart nginx
Create a Sample Site
Let’s stub out some basic HTML to make sure our configuration is working properly:
cd ~/sites
mkdir -p sites.localdomain
mkdir -p example.sites.localdomain
echo "<ul><li><a href='https://example.sites.localdomain'>Example Site</a></li></ul>" > sites.localdomain/index.html
echo "<h1>Welcome to the Example Site</h1>" > example.sites.localdomain/index.html
Test it out
Now try navigating to the following URL in your browser:
https://sites.localdomain
You should see something like the following:
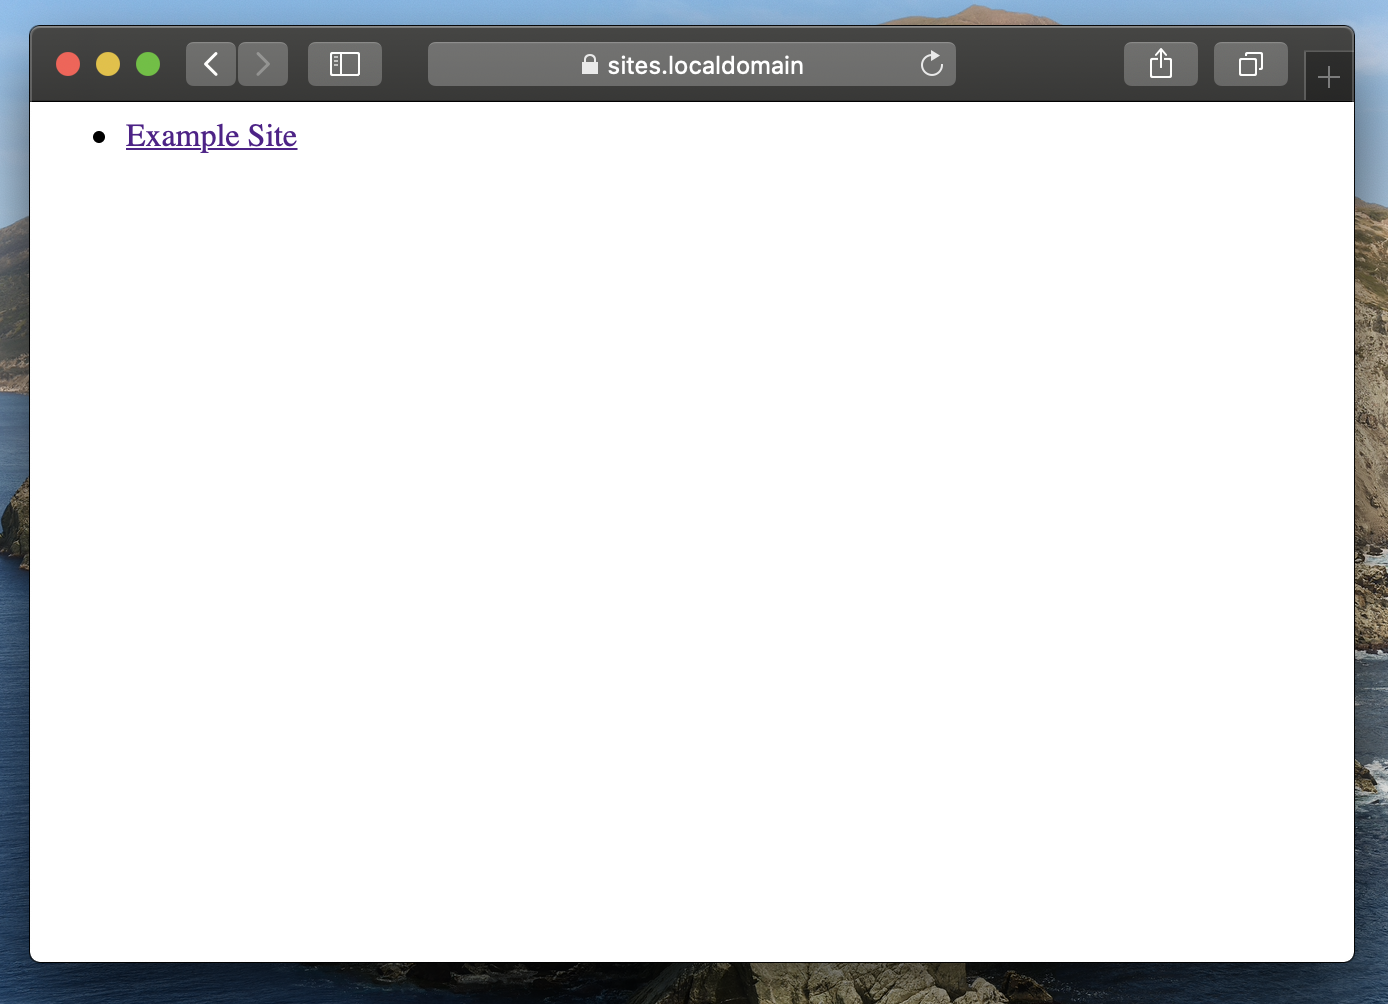
Note the padlock icon, indicating a correctly validated certificate.
If you click the Example Site link you should see something like the following:
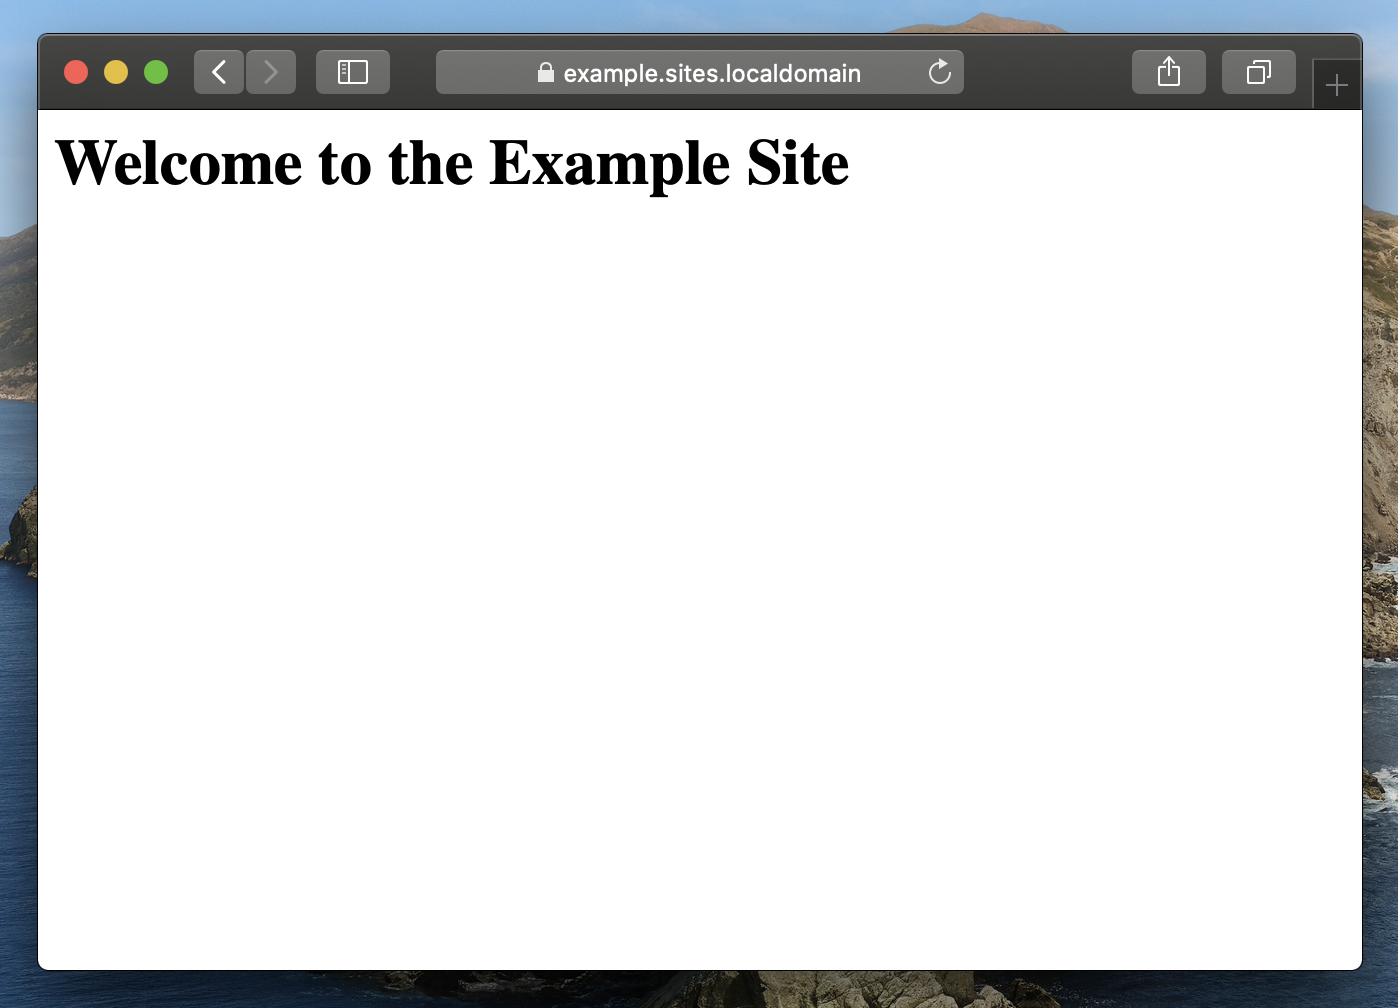
Again note the padlock icon (Try clicking on the padlock to review the certificate), which indicates HTTPS is being used.
Conclusions
There is still a bit too much boiler plate involved in setting up HTTPS on a local machine, but once you do get this wildcarding approach configured it does become very straigtforward to create a new HTTPS enabled site, it becomes as simple as:
mkdir ~/sites/something.sites.localdomain